Grilling is a fantastic way to make healthy, low-fat, perfectly cooked meals, especially in the summer. But there is an art to making great food on the grill. Unlike cooking on the stove, you’re going to be working with incredibly high heat and with burners that are less predictable.
If you want to wow people at the next family get-together or friend barbeque, you’ll need some tips and tricks to learn how to grill. And this guide to grilling will give you all the grilling basics you need!
With this knowledge and just a little experience, you’ll be able to become a real grill master.
Finding Your Grilling Type
One of the first things you need to know is that not all grills are created equal, and not all grilling methods will work for you. There are big differences in cooking times, taste, and appearance depending on what kind of BBQ grill you’re using.
Different types of grill also might be more or less suitable for your area, or where you want to grill. For instance, a natural gas grill is great for homes with a natural gas hookup. But it isn’t going to be a good option if you’re looking for a grill that can go tailgating or camping.
So, what are the grilling types, and what are the differences?
Grilling Types

Gas Grills
Gas grills are some of the most common grills today. There are portable versions that run off propane, like your camp stove. Other versions run off the natural gas hookup in your home.
There aren’t many differences in how these two types of gas cook, but propane is portable while natural gas definitely isn’t.
Gas grills are usually easier to clean than charcoal alternatives. Electric and gas are usually comparable when it comes to cleanup.
You’ll need to familiarize yourself with your grill every time you get a new one. No two gas grills perform exactly the same way.
You’ll also have to worry about parts giving out in gas grills. While most gas grills are very durable, at some point you will have to replace parts or get a new gas grill. They’re also more expensive than charcoal grills, so you’ll need to plan on higher operation and maintenance costs.
The biggest advantage gas grills have, however, is temperature control. You can adjust the temperature of a gas grill much more easily than the temperature of a charcoal grill. Both up and down.
Gas grills can also change temperature faster than an electric grill. That means that you’ll be able to cook a wider range of meats and vegetables with less know-how on a gas grill.
Charcoal Grills
Charcoal grilling is where grill masters can shine. Charcoal provides more grilling flavor than an electric or a gas grill since the charcoal will produce more, and a different kind of smoke and flavor.
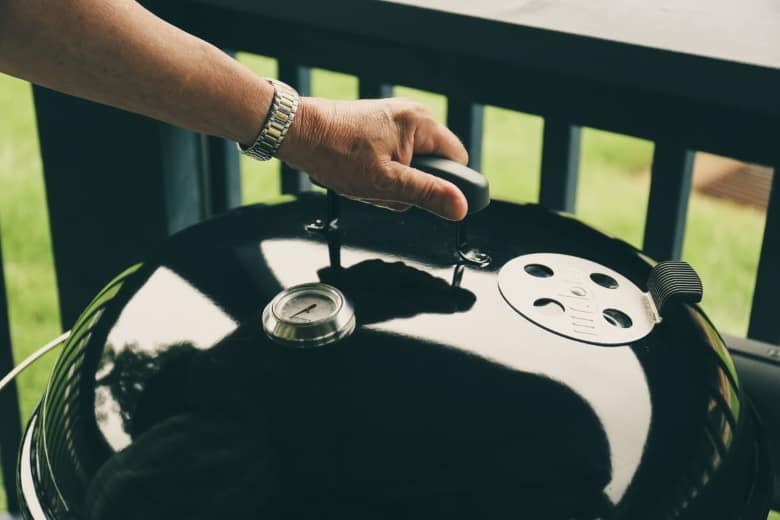
But they also require a lot more finesse. Instead of twisting a dial, opening or closing the lid, and trusting to a thermometer, you’ll be manipulating the fire and the charcoal themselves.
You’ll control temperature not just by adding more or less charcoal, but also by changing the way you build the fire, the way the charcoal is stacked, what vents are open and how much, and whether the lid is on.
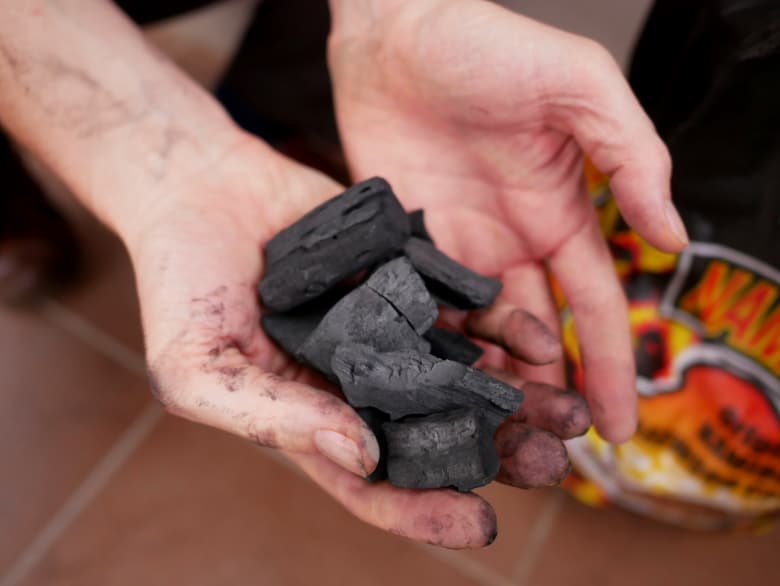
You’ll also need to decide whether you want to use lump charcoal or briquette charcoal. Briquette charcoal usually has a lower maximum temperature, but it burns more consistently and is a little easier to stack and manipulate in the grill.
Lump charcoal can reach incredible temperatures, but it won’t burn consistently and is harder to manipulate or predict. It takes a little more know-how.
You also have the option of sprinkling wood chips over your charcoal for a smokier flavor and more flavor control. Gas and electric grills don’t support adding a favorizing touch to the flame itself (but you can use still planks of wood on the griddle).
Short of adding wood chips, charcoal will only add minimal flavor to fast-cooking grill items like sausages and burgers. Even steaks, especially rare steaks, will only pick up a little. More delicate proteins, like salmon, will benefit most from a wooden plank, not charcoal.
Electric Grills
Electric grilling still hasn’t reached the same popularity as the other two options. But that doesn’t mean that it can’t be an interesting one.
Electric grills reach high temperatures quickly, are often more compact than charcoal and gas alternatives, and some models can even be used indoors.
Electric grills are also often designed to meet different goals. Some are designed to provide a grilling experience as close as possible to a traditional grill. Others focus more on reducing the fat content in your protein or on providing the perfect sear.
Unfortunately, few electric grills will do all those things, so you need to carefully pick which model you purchase.
While electric grills are thought to reduce a lot of the fire hazards associated with grilling, this isn’t entirely true. They produce and disperse enough heat to be a serious melting risk for anything plastic. Like the bottle of olive oil you used to make a marinade.
Make sure to always follow all the safety precautions recommended by the user manual.
Prepare Your Grill
If you’ve seen someone using a grill, in person or on TV, you might think it’s as simple as starting to cook. Fortunately (or unfortunately), there’s more of an art to grilling than that and you absolutely need to know how to prepare a grill.
Here are some common grilling instructions you should follow regardless of the type of grill you’re using.
Basic Safety Prep for Grilling
One of the first things you need to consider is how safe your grilling area is. Have you cleaned up last year’s dried dead leaves? Is there anything potentially flammable near your grill? If you’re grilling outside, how much wind is there?
Grills are fire hazards. Not huge ones, but if you have a lot of yard debris around your grill, paper products, or other easily flammable items, you should clear them away. Aim for a 3 ft safety radius away from the most flammable objects.
You should also check and see if your griddle needs to be cleaned, especially on outdoor grills. You’ll be surprised how common it is to find out that leaves and other debris have made their way into your grill. In the summer, you’ll also want to check for wasp nests and other small insects and wildlife.
Next, make sure you have the appropriate tools, at least a pair of grilling tongs. You should also consider an apron or other protective gear, especially if you’re grilling something with a lot of fat like burgers.
The Spruce Eats produced an extensive guide, including basic and grill-specific prep if you want to learn more.
How To Prepare A Gas Grill?
Before starting a gas grill, check whether you have enough gas. This isn’t an issue with natural gas, but it can be with propane.
You should also check any visible hoses to make sure they haven’t cracked or developed obvious weak points since you last grilled. If you’re at all concerned about the hoses, cover them in a layer of soapy water, turn the gas on very low and look for bubbles.
If your hoses are good, and you’ve already done the prep I’ve already talked about, you’re ready.
Plan on turning on your grill at least 5 minutes before you start grilling. That will give it time to heat up. You may need to give it a little longer if it’s very cold outside, or very windy.
Turn the gas on. Depending on the grill, you may need to do that at the canister, or it may handle the flow from the canister as well as the flow to the burner.
Next, you’ll turn the burners on. Turn them on to about medium (you want to make sure there is enough gas to ignite quickly). If your grill has an ignition switch, hit that once or twice until the burners catch.
If it does not have an ignition switch, use a long-neck lighter and stand slightly to the side to ignite the burners.
Always make sure all the burners are lit unless you have a grill that allows you to turn individual burners completely off and you don’t need that section of the grill at all. The last thing you need is for gas to build up near a bear burner or an unused space.
From here you’ll adjust the burners depending on your desired temperature, close the lid, and wait for the grill to heat. Stay close enough to notice if there are any problems, and check the temperature every few minutes until you reach the desired temperature.
Voilà! You’re ready to grill.
If you want to add extra flavor to your food, consider cedar plank grilling. Other types of planks, like planks from fruit trees, will add a different flavor. You can also grill with lemon slices or fresh herbs on your food.
If you want to add a lot of flavors, consider marinating your meat, or doing a dry-rub, before grilling. Just make sure that marinated meats are dry before you put them on the grill. Dripping can cause flares and temperature changes that make it harder to cook.
How To Start An Electric Grill?
Electric grilling is generally like gas grilling, except that you don’t have to worry about igniting the burners. They also usually heat up a little faster if they’re small, but take a little longer for a standard-sized grill.
The first time you use your electric grill, you may want to do one thing differently. You may want to oil it.
This step is optional but can help develop a non-stick surface and keep your food from sticking to the grill.
Unlike charcoal or gas grills, electric grills don’t get hot enough to completely burn away most cooking oils. Spreading a very thin layer of oil over the grill surface, with a paper towel or something similar, can make electric grilling a little easier.
Electric grilling is also a good option for grilled cheese and some other more delicate foods.
Keep in mind that you should not use wood chips with an electric grill unless your grill has a smoke-box specifically for wood chips.
How To Prepare A Charcoal Grill?
Charcoal grilling takes a little more time and prep before you’re ready to grill. Plan on starting at least 15 minutes before you want to be grilling, and closer to half an hour if you’re still learning.

First, choose between briquettes or lump charcoal. Once you’ve chosen, you need to decide how to light the charcoal. You can light charcoal in the grill itself, but it will take a little longer. Alternatively, you can use a charcoal chimney, which allows you to heat the charcoal much faster.
If you’ve used your charcoal grill before, you’ll also need to clean out the ashes from the last time it was used.
Before you start grilling, you’ll also need to make sure the grill vents are still working and clear. Usually, there isn’t much debris, but even a little can choke your charcoal of oxygen and prevent your grill from heating and cooking well.
I recommend starting with briquettes for your first few times grilling. Many grill masters never use lump charcoal, and there are lots of benefits to briquettes. In addition to heating more evenly and burning in a consistent and even manner, they are also usually ready for match lighting.
Alternatively, you can get a small propane or butane torch to make lighting the charcoal easier. In a chimney, the heat will spread quickly. To do so, light up some of the charcoal, build the heat, and then add a little more until you have the amount you need.
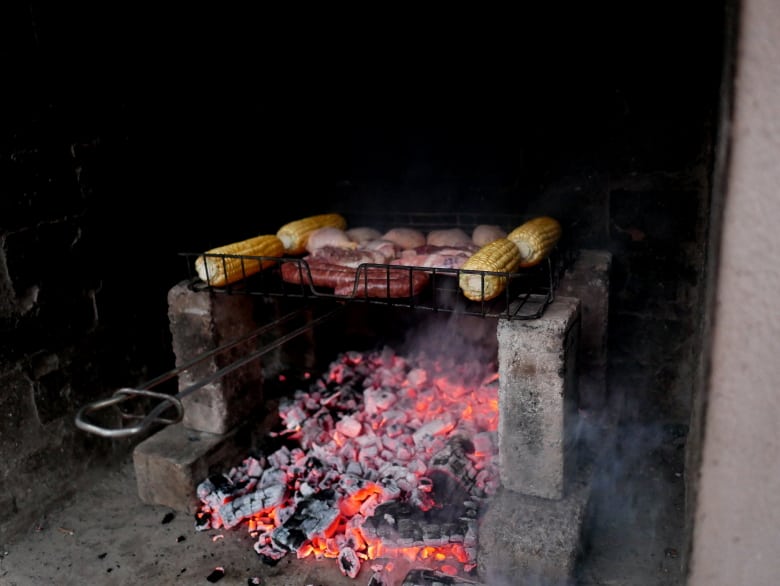
If you want to light the charcoal in your grill, arrange it in a single layer across the bottom of the grill. Try to keep it as even and consistent as you can. This is also how you’ll arrange chimney-lit charcoal after it’s burning.
It takes about 10 minutes for the charcoal to get ready. Once it has spread at the bottom of the grill, close the lid and wait for a few additional minutes, usually 5 to 10 minutes.
Since most grills don’t have a thermometer, it means that you’ll have to learn to assess the temperature by yourself. You can try the “hand test” (make sure your sleeve is rolled up!). All you have to do is to put your hand over the charcoal at about 5 inches from the grate. Then, start counting and see when you have to remove your hand:
- From 2 to 4 seconds, the temperature is high (from 450 to 550°F).
- Between 5 and 7 seconds, the temperature is medium (from 350° to 450°F).
- From 8 to 10 seconds, the temperature is low (from 250° to 350°F).
With charcoal grilling you have the option of marinating your food, using the plank cooking method, or you can also sprinkle wood chips over the charcoal for a smokier more intense flavor.
Charcoal is ideal for grilling hardy vegetables like squash, eggplant, or root vegetables.
But you can also cook pizzas, bread, and other baked foods, providing that you get the appropriate accessory for your grill.
Grill Your Food
What to grill and how to do it are two important questions.
Every type of grilling requires slightly different heat management and grilling techniques. There are also different end goals, which you need to be aware of to learn how to cook on a grill.
Smoking
Many grills can produce smoked meat that’s richly flavorful, a little more rustic, and different. Gas grills with a smoke box can do this, and charcoal grills with a little help. Yet, electric grills can’t create the conditions suitable for smoking.
The best-smoked meals are large chunks, roasts, large whole or rough-cut vegetables, that kind of thing. Smoking requires a low-and-slow cooking technique so that the smokey flavor has more time to work into your food.
You may even want to move your food off the primary cooking griddle and onto the warming section, a rotisserie attachment (if you have one), or even into a cast iron or roasting pan designed for grills.
Keep the temperatures low, and plan on cooking times more as if you were baking your meal in the oven.
Searing
Seared meats and savory vegetables are some of the most delicious types of food. But getting a good sear is difficult. You need high heat, consistent contact points, and time.
Most grills don’t want to be at their highest heat for very long. Electric grills can sometimes handle this better than gas grills, but it can be difficult to get charcoal grills to maintain their highest temperatures since you’ll need to open the vents for oxygen.
To get the perfect sear on your steak, chicken, roast, or even eggplant, you’ll heat the grill as normal. Then turn up the heat. This is easier on gas and electric grills. But you can add a couple of briquettes to a charcoal grill for more heat and close the vents partially (a temporary option), or you can use a small set of bellows to build heat.
Wait a minute or two for the grill to reach the new temperature before placing the food you want to sear. Now, and this is important, you need to wait without moving your food. With a good grill, searing should only take a minute or two.
If you want to sear another surface, quickly flip your food over (don’t use a fork!) and repeat the wait. Otherwise, you should reduce the temperature of your grill for normal cooking.
Dry meats sear best. You may need to move your food around more after searing it to prevent over-cooking. Depending on what you’re cooking, you may be able to go straight from searing to the plate.
Controlling Your Grill
There are a few issues you need to worry about while grilling. Namely, flares, temperature control, and hot and cold zones.
Flares are most common if you’re cooking with fatty or wet foods. Fortunately, they aren’t very dangerous or concerning if you know what to do.
Keep a small portion of your grill empty so that you can move the food over if there is a flare. Use long tongs so you don’t have to worry about burns. Move quickly and calmly. From there, the flare will usually die down on its own and you can move the food back over.
For a more stubborn flare, consider briefly closing the lid to burn off the grease or other problems. Less than a minute should do it.
Many grills have heat zones. There might be two or three different zones depending on how well insulated your grill is, how many burners it has, and a few other design details. At a minimum, you should know where the hottest and coldest areas of your grill are.
For many grills, the hottest area is near the front, and the cooler area is further back. But a few grills may be hotter on the left or right, it depends on the grill.
Your hottest cooking area is best for your hardiest proteins, red meat, and for searing. More delicate foods like vegetables, fish, and poultry, will usually be happier if they spend most of their time in the cooler part of your grill.
If you have a warming rack or rotisserie attachment, you’ll have an additional indirect heating zone. Heat transfer is slower in the indirect heating zone, which means slower gentler cooking, even at the same temperature as the direct heat of the griddle.
Indirect heating zones are also usually a little cooler.
These are a good option for foods that want to cook longer, or which are waiting for a moment to take them off the grill.
One thing you should watch for in any grill is a change in its heating zone. With charcoal, heating differences will usually be a matter of the charcoal arrangement or quality. But on gas or electric grills, a change in how your grill heats can be a sign of something going wrong with the grill.
When this happens, check over your burners when the grill is off. Consider getting a professional to perform maintenance or replace malfunctioning parts if a burner goes out, or suddenly becomes much hotter or cooler than normal.
Maintain Your Grill
Maintaining your grill is just as important as cooking with proper technique. Some things are simple, others take a little more thought.
If you have a charcoal grill, you need to clean out the ash regularly. You can add that ash to a compost pile, or even spread a thin layer over flower beds and under trees to act as a natural fertilizer.
If you have a traditional griddle, like on a charcoal or gas grill and even some electric grills, it needs to be cleaned regularly.
Many people just turn their gas grill on to its highest temperature for 10-15 minutes to clean it. This method can also work for electric grills, assuming you can take them outside to let any smoke vent.
Charcoal grills can be cleaned the same way, but it’s a waste of charcoal, and will typically burn much longer than is needed for a clean.
You should also have a stiff-bristled grill brush for cleaning griddles. A few minutes of elbow grease once a month or so should keep most grills in good condition. You may need to scrub a little more often if you grill more than 1-2 times a week.

You may need a softer bristle brush if you have a porcelain coating on the griddle or the grill burners.
Always remember to check your gas level if you use propane. Ideally, you should check every time you start grilling, so you can get more if you need it before you’re cooking.
You also need to check the gas hoses every time you grill. The hoses and seals can be replaced if needed, but even small leaks can cause big problems if they’re allowed to go.
You’ll also occasionally want to clean the outside of your grill. Dish soap is a great way to cut through the grease and grit that collects on the outside of a grill. Just don’t use it on the interior and especially not on the griddle.
Electric grills can often be cleaned with dish soap; however, they are the exception to the rule.
With an electric grill, you’ll also want to check to make sure the power cord hasn’t melted at all or been otherwise damaged. Check it before every use, and try to keep the cord away from any major sources of heat.
Conclusion
I’ve gone over a lot in this article, so let me quickly wrap up.
There are three different types of grilling, gas, charcoal, and electric.
Electric is a good option for singles and people who want to grill indoors.
Gas is popular because it’s easy to control the temperature and clean the grill, but can be a little more expensive.
Charcoal is considered the best by many flavor enthusiasts, but it is a more difficult and technically challenging way to grill.
There are lots of different grilling styles and ways to cook your food. You can also grill hardy vegetables and many other foods on your grill with the proper equipment, some experience, and the right temperature control.
You also need to maintain your grill regularly. Maintenance is, indeed, critical to good performance and durability.
That’s it! That’s everything you need to know to start on this grilling adventure.
